cream cheese pumpkin muffins
October 22, 2013 § 2 Comments
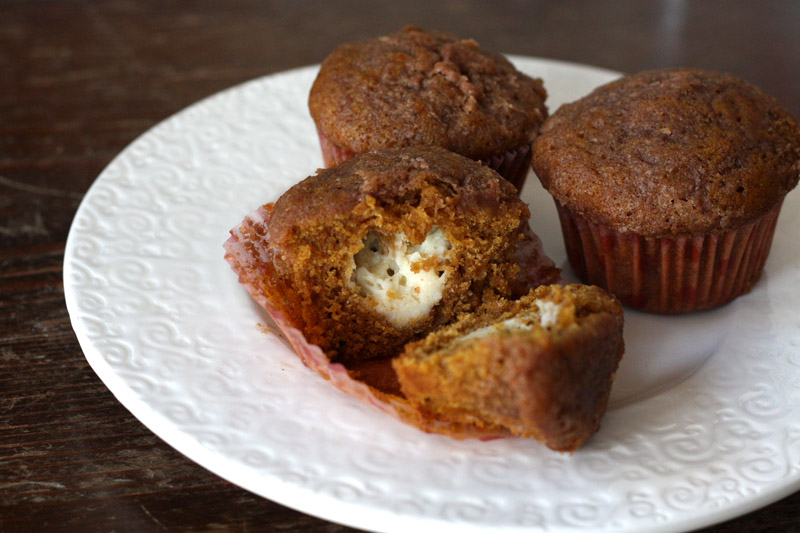
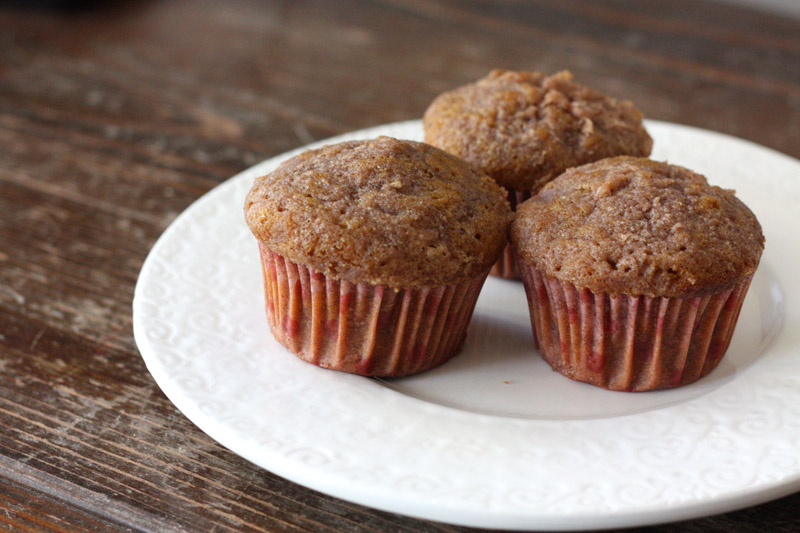
There’s something very satisfying about surprises. In the case of these muffins, they are deceptively plain until you bite in and then – magic! cream cheese centers! Not only are they delicious, but you can feel deviously brilliant at having tricked everyone into thinking they were mere pumpkin muffins.
I know it’s currently the season of pumpkin spice everything, but if you’re not totally oversaturated then these muffins are worth it. They’re moist and spicy and the cream cheese is the perfect complement. I accidentally spilled the streusel topping so just imagine it to be more decadent, but even with half the topping it was plenty sweet and slightly easier to justify eating for breakfast.
Pumpkin Cream Cheese Muffins – adapted from Annie’s Eats
Yield: 12 muffins
Filling:
- 4 oz cream cheese, room temperature
- 1/3 c icing sugar
- 1/4 tsp vanilla
Muffins:
- 1 1/2 cups flour
- 1 1/2 tsp cinnamon
- 3/4 tsp nutmeg
- 1/2 tsp cloves
- 1/4 tsp allspice
- 3/4 tsp ginger
- 1/2 tsp salt
- 1/2 tsp baking soda
- 2 eggs
- 1 cup pumpkin puree
- 5/8 cup canola oil
Topping:
- 1/4 cup sugar
- 2 1/2 tbsp flour
- 3/4 tsp ground cinnamon
- 2 tbsp cold unsalted butter, cut into pieces
Mix all filling ingredients together. Shape cream cheese mixture into a log and freeze for 2 hours. (I only had time for one hour and all was well.)
Preheat oven to 350F. Line a 12-cup muffin pan. In a medium bowl, combine flour, spices, salt, and baking soda. In a large bowl, beat eggs, pumpkin, and oil. Add flour mixture and stir until just combined.
For topping, combine sugar, flour, and cinnamon, and whisk together. Add butter and cut into mixture with two knives or pastry blender until crumbly.
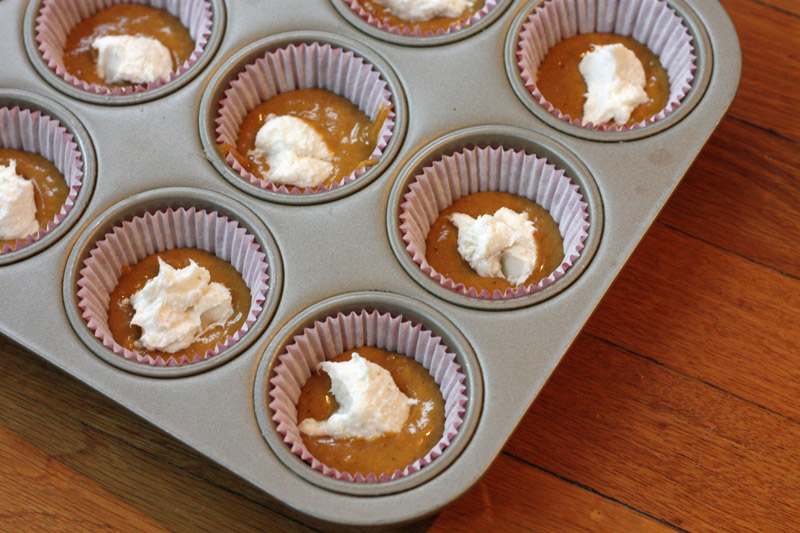
Fill each muffin tin with enough batter to cover bottom (1-2 tbsp). Slice or scoop cream cheese log into 12 pieces and place one in each tin. Cover cream cheese with remaining batter, and then sprinkle topping mixture over.
Bake until tops spring back when touched, 20-25 minutes. Transfer to a wire rack and let cool.
vanilla bourbon pudding
July 26, 2013 § 1 Comment

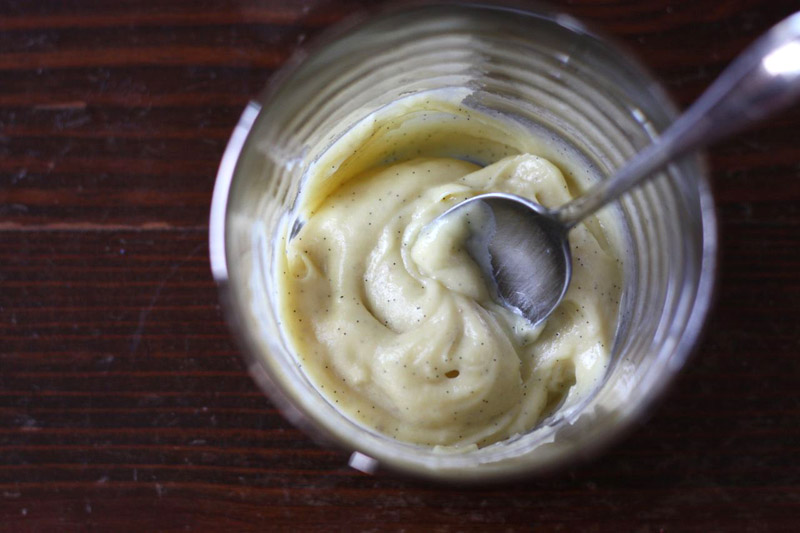
It is approximately one million degrees outside today, and naturally that seemed like the perfect environment in which to revive a baking blog. I thought I would be clever and make a stovetop dessert instead of turning the oven on, but it turns out: stoves are also hot. So, it’s pretty uncomfortable in my house right now, but it’s made up for by the fact that we have vanilla bourbon pudding.
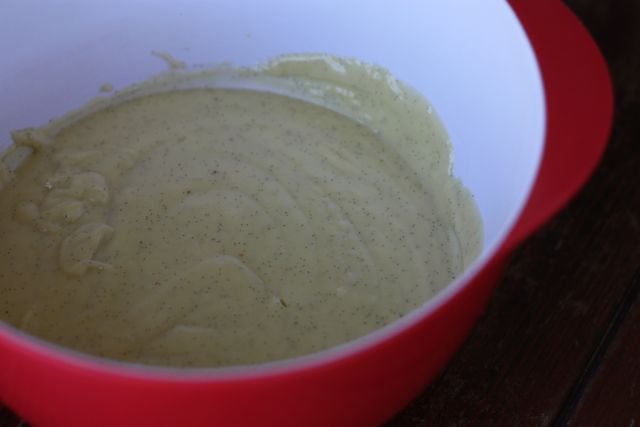
This pudding is pretty quick to throw together, but does require a lot of whisking so it’s best to have either excellent upper arm strength or an uncomplaining sous-chef (I had the latter). The end result is creamy and very rich, and the splash of bourbon highlights the vanilla without being too boozy. It’s intended to be eaten at room temperature because it thickens when cold, but you can add an extra splash of milk if you’d like to eat it straight from the fridge. Given the continuing heat, that’s exactly what I plan to do.
Vanilla Bourbon Pudding – adapted from Martha Stewart
Yield: Serves 4-6.
Note: if you’d like to serve this cold, you may want to increase the milk to 2 2/3 cups as the pudding gets quite thick when refrigerated.
-
1/2 cup sugar
1/4 cup all-purpose flour
1/2 teaspoon salt
2 cups whole milk
1 1/2 vanilla beans, halved lengthwise
4 large egg yolks, lightly beaten
1 1/2 tablespoons butter, cut into small pieces
1 teaspoon bourbon (optional, or can increase to 2 tsp)
In medium bowl, whisk together sugar, flour, and salt.
Pour milk into a medium saucepan; scrape in vanilla seeds, and add the pods. Stir together and cook over medium heat until tiny bubbles begin to form around edges of pot, stirring occasionally, about 5 minutes.
Gradually add the milk mixture to the flour mixture, whisking constantly. Transfer the milk-flour mixture back to the saucepan; cook over low heat, whisking constantly, 5 minutes.
Put egg yolks in a small bowl. Gradually add small amount of the hot milk-flour mixture, whisking constantly. Add yolk mixture back into saucepan. Cook over medium heat, whisking constantly, until mixture comes to a boil and thickens, 8 to 10 minutes.
Remove from heat and discard pods. Add butter and whisk until melted. Pass pudding through a fine sieve into a medium bowl, forcing it through holes with a rubber spatula. Stir in bourbon. Let stand at room temperature until slightly cooled, about 30 minutes.
If refrigerating (see note above): spoon pudding into bowls and refrigerate. If you don’t like pudding skin, put a layer of plastic wrap directly on the surface of the pudding before refrigerating. Let stand at room temperature for 30 minutes before serving.
butterscotch fail
March 28, 2011 § 10 Comments

I have a bit of nostalgia for oldentimes kitchen things. I love aprons, and antique cake pans, and most of all: handwritten recipe cards. In fact, I think this blog may have sprung from my love of recipe cards and the personal touch they carry; it’s a good substitute given my mediocre handwriting (I’m a child of the Internet age) and my propensity for losing things. Then recently I found a handful of passed-down recipe cards, and I leapt at the chance to recreate an oldentimes dessert.

However, I should have taken a cue from the cards themselves. The chocolate dream brownies called for no butter, only shortening. The rum balls were definitely a product of their time. Suspicious, I still decided to attempt the butterscotch bars, and here is the gooey mess that ensued:

yes, those are spoon marks. Don’t judge.
The bars stubbornly wouldn’t cook through, and were thus a bit of a failure. Even though the middle didn’t set, though, the edges did, and I ate them ALL (yes, I felt sick after), and they were insanely delicious. And ever since I’ve had butterscotch on the brain, and have been on the lookout for a better recipe. One that firms up with only moderate gooeyness, but without any crazy modern add-ins like coconut, or resorting to melting butterscotch chips. Since I am so unreasonably picky, I haven’t found one yet (let me know if you have suggestions!), but got my butterscotch fix in another form: cupcakes!

I was lured in by chocolate cupcakes with fleur de sel and butterscotch icing. Embarrassingly enough, this didn’t quite work either – I guess maybe the butterscotch issues are my fault and not that of the recipe card. But despite an icing that was more drippy than intended, these cupcakes were absolutely delicious and definitely worth sharing: a simple chocolate cupcake, hint of salt, and deeply flavoured butterscotch topping. No matter how gooey they may have been, I’ll take it as a success!

Chocolate Cupcakes with Salted Butterscotch Frosting – adapted from Salty Sweets
For cupcakes:
-
1 cup flour
1/2 cup unsweetened cocoa powder
1/2 cup granulated sugar
1/2 cup packed light brown sugar
1 teaspoon baking soda
1/4 teaspoon fine sea salt
5 tablespoons butter
3 tablespoons canola oil
1/3 cup water
1 large egg
1/4 cup buttermilk
1 1/2 teaspoons vanilla
fleur de sel
For frosting:
-
1/2 cup light brown sugar
1 cup heavy cream
2 tablespoons butter
1/4 teaspoon fine sea salt
Preheat oven to 350°F. Line or grease a 12-cup muffin tin.
In a large bowl, sift together the flour, cocoa powder, sugars, baking soda, and sea salt. In a small pot or in the microwave, heat together the butter, oil, and water, stirring until the butter is completely melted. Whisk butter mixture into the dry ingredients until thoroughly combined. Whisk in the egg, and then the buttermilk and vanilla.
Fill the cupcake liners with the batter and sprinkle a little fleur de sel over each. Bake until the tops are set and a cake tester comes out clean, 22 to 25 minutes. Let cool a few minutes in the pan, then transfer to a wire rack and cool completely.
For icing, combine all the ingredients in a pot and heat over medium low, stirring until the butter is melted and the sugar is dissolved, 3-5 minutes.
Turn the heat to low and let simmer for 8 minutes (I needed more like 15 and it still wasn’t thick), until thickened. Remove from heat and let cool completely to thicken further. Spread cool icing over cooled cupcakes.
triple-cheese spinach strata
March 21, 2011 § 14 Comments

Just a quick note to say I’ve started contributing recipes to the new online magazine Honest Cooking, starting with this luxurious breakfast strata. It’s rich, creamy, and can be made in advance for maximum morning laziness. Recipe is below, and more info is here!

Triple-Cheese Spinach Strata with Sundried Tomatoes and Peppers
Yield: Serves 4, but easily doubled in a 9 by 13-inch casserole.
-
1/4 cup chopped dry-packed sundried tomatoes
1 tablespoon butter
1 small onion, finely chopped
1 clove garlic, minced
6 ounces frozen spinach, thawed
1/2 cup chopped roasted red peppers
1/2 teaspoon salt, divided
5 cups cubed French or Italian bread, crusts removed (about 1/2 pound)
4 large eggs
1 cup milk
1/4 cup heavy cream
1 tablespoon Dijon mustard
Pinch freshly ground pepper
1/3 cup ricotta
1 cup gruyère, grated
1/2 cup parmesan, finely grated
Cover sundried tomatoes with boiling water and let sit for 15 minutes. Drain off water. Squeeze handfuls of spinach to remove as much water as possible, and then chop.
Over medium-low heat, heat butter until no longer bubbling. Saute onion until softened and translucent, about 5 minutes. Add garlic, stir until golden, about 30 seconds. Stir in spinach, peppers, sundried tomatoes and 1/4 teaspoon salt. Stir until mixture is dry, about 1 minute, then remove from heat.
In a buttered 8-inch square casserole, layer half of bread cubes. Spread over half of spinach mixture, then spoonfuls of half of ricotta. Scatter over half of gruyère and parmesan. Repeat layering.
In a medium bowl, whisk together eggs, milk, cream, mustard, 1/4 teaspoon salt, and pepper. Pour egg mixture evenly over casserole. Cover with plastic wrap and refrigerate overnight.
In the morning, remove casserole from the fridge and let sit while preheating oven to 350°F. Bake casserole until browned and cooked through, about 45-50 minutes.
better burger buns
March 13, 2011 § 5 Comments

I still haven’t quite accepted the fact that bread is something I can actually make, myself, in my own kitchen. This is partly because it seems like a slightly magical process, and partly because I have failed many, many times. I don’t know whether my kitchen was too cold or my yeast had died or someone had cursed me with bread voodoo, but it never quite went as it was supposed to. But, still I persevere, and when it works, the satisfaction is enough to sustain me through several more failures.

Luckily, this was not one of those failures. My roommate slow-cooked pork shoulder for 24 hours in order to make pulled pork sandwiches: something made with this much care clearly couldn’t be stuffed into stale supermarket buns. After finding this incredibly straightforward recipe, and realizing that it could be made entirely within my stand mixer, I threw caution to the wind and decided to make homemade buns. Daredevil that I am, I even doubled the recipe.

Apparently my bad bread vibes were on vacation this week, and the buns turned out gorgeous. They’re soft, barely sweet, and sturdy enough for a pretty sloppy filling. I made them into kind of weird shapes by accident, but I’m sure most people’s bread skills will yield pretty circles instead of amorphous blobs. They take a good sandwich to great, and are pretty hard to screw up – trust me, I tried.

Burger Buns – Adapted from King Arthur Flour
Yield: 8 buns
-
3/4 to 1 cup lukewarm water
2 tablespoons butter
1 large egg
3 1/2 cups all-purpose flour
1/4 cup sugar
1 1/4 teaspoons salt
1 tablespoon instant yeast
Topping:
- 1 large egg
1 tablespoon water
4 tablespoons sesame seeds
Mix and knead all of the dough ingredients to make a soft, smooth dough (this can be done by hand or in a mixer). Cover the dough, and let it rise for 1 hour, or until doubled in bulk.
Gently deflate the dough, and divide it into 8 pieces. Shape each piece into a round 1 inch thick; flatten to about 3 inches across. Place the buns on a lightly greased baking sheet, cover, and let rise for about an hour, until very puffy.
Beat egg with water, and brush lightly over buns. Sprinkle with sesame seeds.
Bake the buns in a preheated 375°F oven for 12 to 15 minutes, till golden. Cool on a rack.


